Following my Puch
E50 meltdown last December, I didn't have the time and money to fix it, but I've finally gotten around to it. I showed my busted engine pieces around to friends and we've narrowed it down to a broken wrist bin or a disintegrated con rod needle bearing. The bearing breaking apart is more likely than a broken wrist pin, but it seems a broken wrist pin would more likely cause all that destruction. Either way, the failure may have been caused by the play in needle bearing. There's a
discussion about this on Moped Army. I was nervous about this on the build last summer, but decided to ignore it. I'm not positive that led to the demise of my engine five months later. At the very least I won't make that mistake twice (see below).
What went into the new build:
- 70cc DMP Cylinder (the original high compression head wasn't damaged)
- Aluminum Stuffed Race Crank
- 3-shoe clutch with Paz springs
- New brake pads
Problem #1
So, the first thing that needed to happen was to pull the engine apart. I started by trying to pull the flywheel. I've done that a hundred times with my
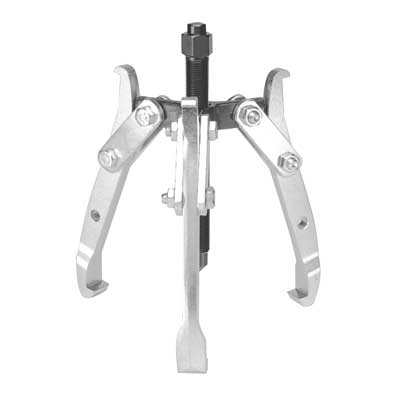
gear puller, but this time it was being especially stubborn. I cranked on the puller to the point where the threads were starting to strip, but the flywheel wouldn't budge. I had my buddy Eric take a look at it and he was totally stumped by it as well. I wasn't too worried about the flywheel, since I had a spare Bosch flywheel from the Batavus I rebuilt, but what I wanted was the stator plate. Anyway, Eric had a heavy duty puller and we tried that, but only managed to bend the flywheel so the outside was concave. I wish I had a picture, but I chucked it out before I got the camera. Perhaps the
actual tool would have been a better idea, but that thing was ridiculously stuck. I ended up slicing through the shaft with a hack saw to get to the stator plate. Then I pounded on it with a hammer for an hour to try to separate the flywheel from what was left of shaft, but they were not coming apart. I have no idea what happened. Maybe the woodruff key had some extra play and got wedged between the two pieces. I've never had any problems in the past. It did seem to me that the crank shaft material was too soft. The taper on the clutch side deformed a bit and I had to grind it down to get the clutch bell bushing off. Not sure what they do with the stock cranks, but the "race" crank definitely wasn't case hardened. I don't think drive shafts are usually case hardened, but either way the material was definitely softer than the stock shaft. Anyway, I got what I needed, which was the stator plate. Now I'm just worried about doing this again with my new after market crank.
Rebuilt engine

Problem #2
Alright, so I got everything apart and rebuilt the engine. If you're doing this on an E50, check out this
walkthrough. This time I got the 70cc DMP kit (as opposed to the K-star), which is
Treat Kit 1.5. I had been told that the ring gap was off to the side so that the gap/boss wasn't going through the inlet port (like it does on the K-star). Apparently I heard wrong or was gypped as the piston was identical to my K-star kit. In fact there was no difference between the DMP and K-star as far as I could tell, although I thought the quality of the casting was a little worse on the DMP and the ports weren't as nicely chamfered. Anyway, I threw it all together and it started up on the first try. It buzzed a bit, but my K-star was super noisy too and thought nothing of it. If I was a smart and patient person I would have disassembled it and investigated, but I am not that person, so around the block I went. No issues so I decided to hook up the lights and then take it out for some tuning. I got about 100 meters before the sickening sound of silence. I had avoided high RPMs, but apparently I pushed it too hard because I seized it yet again. Damn. I wheeled it back to the garage and tore it apart to find the piston ring had broken and a piece had caught between the piston and one of the transfer ports. In my haste I had neglected to measure the ring gap and I had not been very aggressive chamfering the ports. So, I think it was one or both of these that caused the ring to break and seize the engine. Great work Geoff. That's a quick $100 down the drain. Honestly the cylinder is salvageable, there is just a small notch at the transfer port that needs to be sanded down, but I wasn't happy with the quality of the casting anyway, so I decided to go back to the K-star. A few days later that arrived in the mail and I threw it all back together (after a lot of port chamfering, especially on the exhaust). I also checked to make sure the ring gap was in
spec. If anything the gap was a little on the big side. So, I ran it around the neighborhood a couple times and managed not to seize it. I spent the next couple days riding it very gingerly. Then I took it out to the country roads and let her rip. After a little tuning it's running great. I hit about 49 mph, which is probably 2 or 3 more than I was getting before.
Busted piston ring


Notch in the cylinder

The current setup:
70cc K-star
Aluminum Stuffed Race Crank
3-shoe clutch with Paz springs
Tecno Estoril Exhaust
19mm PHBG Carb
Uni air filter
88 main jet
45 idle jet
17x41 Gearing
Case matched
I forgot to mention what I did about the play in the needle bearing. I ended up buying a stock con rod
bushing, slicing it with a hack saw, and then sanding it down to about 3mm (there was about 6.5mm of play). See pic:

The future:
- Clutch tuning
- Paint job! Haven't decided on a color scheme yet