Sunday, December 4, 2011

Curtains

The first big project with my new sewing machine. I will give it some credit for making it through with no issues. I'm too lazy today to write about the fun, but here are some pics:


Thursday, November 17, 2011

Sort of Excited About My New Sewing Machine


When I left Vancouver a couple years ago I sold my sewing machine (along with almost everything else). I had bought it used off of craigslist for $65 and then two years later I sold it for $65. Awesome. It wasn't a fancy machine. Just a Kenmore that was probably 10-20 years old, but (more or less) it got the job done. It definitely struggled at times with some of the spots on the shoulder bags I made, but I wasn't expecting miracles.

So, now that I'm settled in a new place/life I was ready to invest in a new machine. I'm not proud of this, but I was just too lazy to go hunting for an used machine. It's not like I don't have time, I just didn't want to trek all over the city on the bus trying to find a machine that I liked. Anyway, I ended up doing a bunch of research online and decided on the Singer 4423. It did everything I wanted out of a machine and it got good reviews. I found it on sale and ordered one. It came last night and my first reaction is that it looks/feels cheap. I do like the style of the machine, but they used an abundance of plastic on this thing. In fact, almost everything that you see or touch is plastic. More specifically ABS. It's not just the fact that it's plastic, the parting lines (where the separate parts come together) are not very precise. The gaps aren't consistent and there are little steps all over the place. To be fair some of this probably comes from working in an industrial design studio where we nitpick every detail. My old Kenmore also used a lot of plastic, but the construction was much better. Plus most of the pieces that were touched had consistently better CMF (color/material/feel). I think almost all the knobs, wheels, levers, etc were steel. It just seems ironic that it's called "Heavy Duty" and nothing about it feels heavy duty. To be fair, it does sew things, which is obviously it's primary function, but I also haven't done more than a few test lines. I'm concerned about how it will handle the canvas and webbing I use on the bags I make. I also realize that you get what you pay for and this thing wasn't very expensive. The verdict is still out, but so far I'm not impressed...

Monday, November 14, 2011

Forgotten Wall Prints

I made theses a couple weeks ago and forgot to post them. I made them from pictures I had taken in the last couple years.


The original image is from my road trip to Detroit/Toronto/Montreal last year. This was taken in Crook, CO where Anthony and I were forced to spend the night because we had brake problems. This place was straight out of the Twilight Zone, but it was beautiful watching this thunderstorm roll across the plains.


The original image was taken in Vancouver during the summer of 2009, just a couple weeks before I left for Berlin. It was just an interesting truck parked in my neighborhood.

Sunday, November 13, 2011

Fun with the ZA50 Engine


I've actually done a lot of work on my 1979 Puch Maxi(affectionately named: Bettina) over the last few weeks, but I've been too lazy to document any of it. Mostly I was having issues with the first-gear clutch wanting to engage at idle (despite a REALLY low idle speed). This causes the bike to jump around a bit while I'm sitting at stop signs. Sometimes it's bad enough that it will stall the engine. So, I took apart the clutch/transmission following the wiki from Mopedarmy.com.

While I was taking apart the clutches I wanted to also check the shift dampers (pucks). I had bought some new ones a while back and I had never checked whether or not the original pucks were still good. Anyway, the dampers are inside the second-speed gear. Unfortunately you can't see them without taking off these two plates that are held together by three flat-head bolts. Two came out with minimal effort, but one gave me a huge headache. I ended up having to do quite a bit of dremel surgery in order to get it out. I wanted to put in some hex heads, but my little local hardware store only had phillips head, which is still a minor upgrade.


So, after all the angst associated with getting that one bolt out, it turns out the pucks were in perfect condition... At least they'll be easier to check in future.

Other updates:

- Down-jetted because of the colder weather, plus I was already running a little rich
- Chased all 6 of the tapped holes (M6) for fastening the clutch cover.
- Transmission fluid was leaking from one of the bolts, so I sealed it with some Yamabond.

My new toy:

Coaster


I'm not sure I love how this turned out, but I thought it was worth a try. Here is the: inspiration/instructions

Bonus point if you can figure out the map.

Monday, October 17, 2011

Saturday, October 15, 2011

(Almost) Off My Hiatus


It has been a depressingly long time since I've gotten my hands dirty with any DIY or art projects. I would blame the move, new city, and busy job, but honestly I've just lacked motivation. Well, that (sort of) changed today. I had to pick up some new pillows and towels for my parents upcoming visit and I grabbed a city car for a couple hours. It didn't take too long to take care of that errand, so I headed over to Flax and stocked up on supplies. I had left all my screen printing supplies with a friend in Vancouver, so I had to start from scratch. I also got some other supplies for a decoupage project. So, I haven't actually done anything YET, but soon you can expect an update. In fact, I'm going to start coating the screen with emulsion right now (fyi, not a euphemism)...

Thursday, March 17, 2011

Another E50 Rebuild


Following my Puch E50 meltdown last December, I didn't have the time and money to fix it, but I've finally gotten around to it. I showed my busted engine pieces around to friends and we've narrowed it down to a broken wrist bin or a disintegrated con rod needle bearing. The bearing breaking apart is more likely than a broken wrist pin, but it seems a broken wrist pin would more likely cause all that destruction. Either way, the failure may have been caused by the play in needle bearing. There's a discussion about this on Moped Army. I was nervous about this on the build last summer, but decided to ignore it. I'm not positive that led to the demise of my engine five months later. At the very least I won't make that mistake twice (see below).

What went into the new build:
- 70cc DMP Cylinder (the original high compression head wasn't damaged)
- Aluminum Stuffed Race Crank
- 3-shoe clutch with Paz springs
- New brake pads

Problem #1

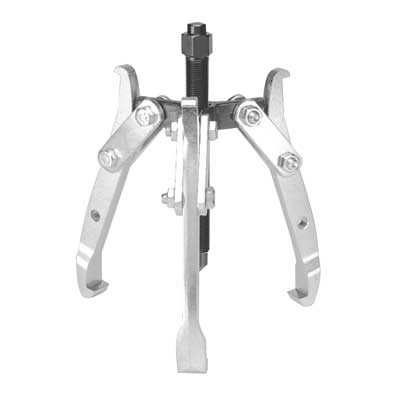
So, the first thing that needed to happen was to pull the engine apart. I started by trying to pull the flywheel. I've done that a hundred times with my gear puller, but this time it was being especially stubborn. I cranked on the puller to the point where the threads were starting to strip, but the flywheel wouldn't budge. I had my buddy Eric take a look at it and he was totally stumped by it as well. I wasn't too worried about the flywheel, since I had a spare Bosch flywheel from the Batavus I rebuilt, but what I wanted was the stator plate. Anyway, Eric had a heavy duty puller and we tried that, but only managed to bend the flywheel so the outside was concave. I wish I had a picture, but I chucked it out before I got the camera. Perhaps the actual tool would have been a better idea, but that thing was ridiculously stuck. I ended up slicing through the shaft with a hack saw to get to the stator plate. Then I pounded on it with a hammer for an hour to try to separate the flywheel from what was left of shaft, but they were not coming apart. I have no idea what happened. Maybe the woodruff key had some extra play and got wedged between the two pieces. I've never had any problems in the past. It did seem to me that the crank shaft material was too soft. The taper on the clutch side deformed a bit and I had to grind it down to get the clutch bell bushing off. Not sure what they do with the stock cranks, but the "race" crank definitely wasn't case hardened. I don't think drive shafts are usually case hardened, but either way the material was definitely softer than the stock shaft. Anyway, I got what I needed, which was the stator plate. Now I'm just worried about doing this again with my new after market crank.

Rebuilt engine


Problem #2

Alright, so I got everything apart and rebuilt the engine. If you're doing this on an E50, check out this walkthrough. This time I got the 70cc DMP kit (as opposed to the K-star), which is Treat Kit 1.5. I had been told that the ring gap was off to the side so that the gap/boss wasn't going through the inlet port (like it does on the K-star). Apparently I heard wrong or was gypped as the piston was identical to my K-star kit. In fact there was no difference between the DMP and K-star as far as I could tell, although I thought the quality of the casting was a little worse on the DMP and the ports weren't as nicely chamfered. Anyway, I threw it all together and it started up on the first try. It buzzed a bit, but my K-star was super noisy too and thought nothing of it. If I was a smart and patient person I would have disassembled it and investigated, but I am not that person, so around the block I went. No issues so I decided to hook up the lights and then take it out for some tuning. I got about 100 meters before the sickening sound of silence. I had avoided high RPMs, but apparently I pushed it too hard because I seized it yet again. Damn. I wheeled it back to the garage and tore it apart to find the piston ring had broken and a piece had caught between the piston and one of the transfer ports. In my haste I had neglected to measure the ring gap and I had not been very aggressive chamfering the ports. So, I think it was one or both of these that caused the ring to break and seize the engine. Great work Geoff. That's a quick $100 down the drain. Honestly the cylinder is salvageable, there is just a small notch at the transfer port that needs to be sanded down, but I wasn't happy with the quality of the casting anyway, so I decided to go back to the K-star. A few days later that arrived in the mail and I threw it all back together (after a lot of port chamfering, especially on the exhaust). I also checked to make sure the ring gap was in spec. If anything the gap was a little on the big side. So, I ran it around the neighborhood a couple times and managed not to seize it. I spent the next couple days riding it very gingerly. Then I took it out to the country roads and let her rip. After a little tuning it's running great. I hit about 49 mph, which is probably 2 or 3 more than I was getting before.

Busted piston ring


Notch in the cylinder


The current setup:
70cc K-star
Aluminum Stuffed Race Crank
3-shoe clutch with Paz springs
Tecno Estoril Exhaust
19mm PHBG Carb
Uni air filter
88 main jet
45 idle jet
17x41 Gearing
Case matched

I forgot to mention what I did about the play in the needle bearing. I ended up buying a stock con rod bushing, slicing it with a hack saw, and then sanding it down to about 3mm (there was about 6.5mm of play). See pic:


The future:
- Clutch tuning
- Paint job! Haven't decided on a color scheme yet

Tuesday, March 8, 2011

Ch-ch-changes

Change is once again afoot and this one bodes well for making and doing. I got a job offer from a company in San Francisco that is a great opportunity. I haven't committed yet, as I am also waiting to hear from a company in Boston, but chances are I'll be in SF within the next month. This means I'll be going back to the stable life (i.e. space and supplies and money to make and do). I've already made a wish list of DIY supplies to get once I'm settled. I'm also going to make a quick trip up to Vancouver to grab my screen printing supplies as well as my two mopeds. I'm excited to get my hands on the ZA50 (the engine on the green one):


I've also seen a couple blog articles recently about the accessibility of consumer products. There was a time that products were easy to disassemble and fix and came with diagrams of their inner workings, but in our disposable consumer product society items are discarded or must be taken to a repair shop to be serviced. And while there is nothing wrong with having an expert work on your car, sewing machine, computer, house, etc, there are those of us that want to tinker, repair, and improve the products we buy. It is cool to see designs that incorporate this kind of accessibility in their products like this, while it is disappointing to see companies like Apple sabotage it.

Sunday, February 13, 2011

Geoff Hill: Trend Setter


Clearly the Grammy committee saw my blog post and agreed that the Arcade Fire's: The Suburbs was indeed the best album of the year. Apparently more music industry bigwigs are reading my blog than google analytics would indicate, who knew!?

Sunday, January 2, 2011

Best Albums of 2010 IMHO

Well, unfortunately 2010 was not my most successful year in making and doing. 2010 was mostly the year of fixing the things that keep breaking. Luckily there were plenty of great albums to keep me company as my electronics and mopeds crumbled around me. There was a bit of shuffling around from my list in May, but the early year albums are well represented. Mostly because I haven't gotten the albums that came out in the last couple months. Anyway, here are my favorite 18 albums of 2010. Happy 2011!

1. Arcade Fire - The Suburbs
2. The Tallest Man On Earth - The Wild Hunt
3. Nathaniel Rateliff - In Memory of Loss
4. Apples in Stereo - Travellers in Space and Time
5. The New Pornographers - Together
6. Surfer Blood - Astro Coast
7. Portugal. The Man - American Ghetto
8. Broken Bells - Broken Bells
9. LCD Soundsystem - This Is Happening
10. Mumford & Sons - Sigh No More
11. Best Coast - Crazy For You
12. The Radio Dept. - Clinging to a Scheme
13. Cameron Scott Fraser - Promised Land
14. Beach House - Teen Dream
15. Vampire Weekend - Contra
16. Frightened Rabbit - The Winter of Mixed Drinks
17. Titus Andronicus - The Monitor
18. Land of Talk - Cloak and Cipher

When Moped Engines Explode

This happened about two weeks ago and I don't currently have the money to fix it, but there will be a future post about rebuilding my engine. It is a bit of a mystery as to what broke first, but I think it was the wrist pin. Check out the carnage:


Reflowing a GPU on a Macbook Pro

*UPDATE 12/11* In the last year I've done this two more times and both times it has come back like a champ. The moral is, it's not as much of a crap shoot as I had anticipated. Also, it's not necessarily a permanent fix, but I've got an extra year out of it with minimal effort. If you're planning on doing this I highly encourage giving it a try.

It was heartbreaking. My screen went black and the computer froze. Maybe par for the course with my PC, but I expect more from my Macbook Pro. I rebooted to find a checkerboard of confusion where my desktop used to be. It looked like this:

You could sort of navigate around, but it was nearly impossible to read anything on the screen. Subsequent reboots changed nothing and I began to fear the worse, my computer was finally dead and there was no bringing her back. I'm certainly in no financial position to buy a new MBP, so this represents a serious blow to my ability to work. I did some research on the interweb and discovered that the most likely cause for my issues was a loose connection between the Graphics Processing Unit (GPU) and the logic board. The only way to fix it was to replace the whole logic board or reflow the GPU. Reflowing is heating the solder connecting the chip to the board until it melts and "reflows". Then you just hope that it reflows in such a way that the broken connection fixes itself. The whole thing is complicated by the fact that the solder connections are all hidden under the chip, so a soldering iron will not help you. The trick is to heat the whole chip and just hope you don't ruin it or the rest of the logic board in the process. The techniques I came across involved either candles, blow torches, or heat guns. Since I wasn't going to spend $700 for a new logic board I decided there was nothing to lose. I might as well cook the chip and give it a try. I decided to go with the heat gun technique since I couldn't bring myself to expose my laptop to an open flame.

I'm not going to do a step by step walkthrough, but I will tell you some of the important specifics if you are looking to do this yourself. If you want more info check out these posts here, here, and here.

First step was taking apart the laptop, removing the logic board, and cleaning off the thermal paste. Luckily I have lots of experience with this from my last laptop adventure. Once the logic board was out and cleaned I made a heat shield out of about 6 layers of aluminum foil:


Next came the fun part (by "fun" I really mean "harrowing"). It was time to cook the chip. I got it as horizontal as I could and then placed a couple pieces of solder next to the chip on the foil. This was my temp gauge. In a perfect world I would have had a IR thermometer. This was procedure:

1. I started out with the heat gun about a foot above the chip with the fan on low and the temp set to about ~300C (although the controls on the gun are pretty crude). I think the solder in the chip needs to hit about 210C. Over about 60 seconds I slowly moved the gun down until it was about 2 inches above the chip.

2. I held it there for about 5 minutes then I put the fan on high. After about 5 more minutes the solder pieces on the foil melted. I was using 60/40 solder, which melts at 188C, so I knew I was close.

3. I continued to heat the chip for two more minutes. That seemed like a reasonable amount of time for the heat to soak through the chip and melt the solder below.

4. Finally I turned the fan down to low and slowly raised the gun up to about a foot over 60 seconds to slow the cooling a bit.


I removed the aluminum foil and let the board cool for about 30 minutes. I did the reassembly (don't forget the thermal paste) and then came the moment of truth. Honestly I didn't think there was any way in the world this was going to work. I figured I actually made it worse. No loss since it was essentially and expensive paperweight by that point. Anyway.... I turned it on.... and success! No f@#$ing way! I could not believe it. All in all it only took me about an hour and a half and it's been working great for the last three days. At this point I just need it to survive until I find a new job and can buy a new one, but in the interest of avoiding needless consumption I hope this one lasts for as long as possible.

Monday, December 13, 2010

Wednesday, December 8, 2010

More Concert Posters


This is my kitschiest work yet.

Wednesday, December 1, 2010

New Website for Mechanical Design


So, I've been under a rock for the last few months. Mostly I've been trying to get my freelance and contract mechanical design enterprise off the ground. Unfortunately this did not involve any cute sewing projects or fun new screen prints, but I've got to at least try to make a living. So, if you're curious as to what I've been doing, or if you need an engineer/designer, check it out:

geoffmhill.com

Wednesday, October 6, 2010

New Hard Drive, RAM, and Thermal Paste for a Macbook Pro


(Side note: It's time to let go of my irrational distain for capitalization. From now on I'll actually use the shift key.)

Anyway, my Macbook Pro has been my most prized possession over the last 4 years. As much as I try not to get caught up in the ownership of shiny objects, my MBP is my primary means of communication, entertainment, and productivity. Recently as I've started taking on freelance work, my MBP is my only office. Unfortunately it's aging and with that age has come some problems. The most notable of these is that it overheats, the hard drive is jam packed, and it bogs down sometimes when using SolidWorks (the CAD software I use for work). So, I decided to tackle all three of these with a D.I.Y. blitzkrieg. Here is the rundown on the problems and solutions:

My computer started having overheating issues a couple of years ago. Recently it's been common for my computer to be above 70 deg celsius when virtually nothing is running. There are tons of forums talking about Apple's poor application of thermal paste being the culprit. I've been using smcFanControl to monitor and manually control the fans, but even so my CPU temp has gotten into the 80s and 90s on regular occasions and has crashed the kernal several times. Admittedly I wasn't convinced it was solely a case of poor thermal pasting as I could generally get the temps down by shutting down hung up processes in the Activity Monitor. The most common offenders are Adobe Flash and iAntivirus. Even still, normal operating temps were around 60 or 70 C, which was much higher than when it was fresh out of the box. So, I did a bunch of research and found some tutorials and advice on reapplying the thermal paste and cleaning out fans and ducts. This post isn't meant to be a walkthrough, but has info on my experiences. If you're looking to do this on your MBP, check out:

- Disassembling First Generation MBP
- Reapplying Thermal Paste
- Application Instructions for Arctic Silver 5

Another problem I've been struggling with is hard drive space. My MBP came with a 120 GB drive, which was huge at the time, but I managed to fill it pretty quickly. I like keeping as much as I can on my hard drive since I travel a lot with it (I'm currently writing this in a coffee shop). My music alone takes up more than 60 GB and I find I have to cull through it periodically just to free up a gig or two. Since I'm constantly on the edge I find I am always uninstalling and reinstalling software to make room for other programs or files. I also run SolidWorks off Bootcamp, which means partitioning a cramped drive, which just makes two extra cramped drives. I did switch to Parallels recently, but now I'm having RAM issues (see below). I do have a time capsule, which is great, but it doesn't help me when I'm in the library or in Berlin. So, it's time for an upgrade. I didn't need anything huge, but I figured 500 GB should give me some breathing room. After a bit of research I settled on the Seagate Momentus 500GB 5400RPM drive. I decided to go with the 5400 RPM over the 7200 since they seem to have fewer issues and they create less heat and drain the battery slower for only a marginal decrease in speed.

I was getting tired of having to switch between OS X and Windows XP on bootcamp for work (unfortunately there is no mac version of SolidWorks). So, I decided to give Parallels a try. The advantage of Parallels is that you can run OS X and another operating system simultaneously. The downside is that running two operating systems at the same time is taxing on the processor and memory. Since upgrading the processor means getting a new computer, I opted instead to upgrade the RAM. It turns out my 15" 2.33 GHz MBP can only handle 3 GB (you can check what type of RAM you need and how much you can install here). Since I already had 2 GB, I got a single 2 GB chip to replace one of my 1 GB chips. I figure if the extra gig makes Parallels manageable, then great, otherwise I'll have a huge HD and can partition it with Bootcamp without having to stress over the space.


Ok, so now the exciting (or perhaps not-so-exciting) results. I got everything shipped and it arrived within a day or two of each other. I actually got the RAM a bit early and installed that since it's super simple. The thermal paste and HD replacement would be all one big surgery. After messing up the wifi antenna on my ipod touch I was a little nervous and was determined to go super slow and be super careful with the MPB. I carefully took it apart and wore my anti-static wrist strap once the logic board was exposed. Everything went pretty smoothly, although the screws holding in the optical drive were rather stubborn and it took a lot of patience not to strip them. I took this opportunity to clean out all the dust that's accumulated over the last 4 years. Once I got the fans out I found both the ducts completely packed with dust, which certainly wasn't helping my overheating issue. Here are some pics of thermal paste on the chip side and heat sink side.


It definitely looks like it didn't have great contact between the two. So, I cleaned off the old stuff and prepped it for a new application.


From there I applied the new paste and put the logic board back in. I then installed the new hard drive. I finished up reassembling the entire computer and then came the moment of truth. I plugged it back in and pushed the power button... and nothing. No lights, no noises, nothing on the screen, nothing. As you can imagine that's about where my heart sank. I knew there was a possibility of this sort of thing happening, but I had higher hopes. Anyway, I spent the next few hours trying everything I could to solve the issue. I tore it all apart and put it all back together several times; I tried the original configuration of components; I even tried banging my head against the wall, all to no avail. After trying everything I could think of and reading dozens of forums about people with similar issues, I concluded that it was the logic board that had been fried and it was either gonna cost me $400 to fix that or I was going to have to mortgage my soul for a new computer. So, I slept on it and the next morning I tore it apart and reassembled it again for good measure.... and then.... nothing. There was one thing that was bugging me. When I was originally reassembling the computer I accidentally used a screw that was too long along the back side of the case. There was a little resistance, so I stopped and put in the right one. When I took it back apart I saw that the cable from the screen to the logic board was right behind that screw hole. I checked the cable and it looked fine. Anyway, it was bugging me so I unplugged the screen and tried to turn it on.... success! I mean, as much success as you can have when you have a computer with no screen. It was making all the right sounds. The hard drive and fans were working and it was beeping like it's always beeped. That was sort of good news since I knew exactly what was wrong. Unfortunately a new screen costs more than a new logic board. Bummer, but I had posted about my woes on Facebook and got a message from my friend Tera who had an old busted MBP (coffee spill incident) that she'd let me cannibalize. Turns out it was the exact same model, so I swapped out the screens and total success! I now have a completely functional computer once again, despite almost totally ruining it.


Now with all the new stuff it's definitely a new computer. The RAM helps Parallels run a bit faster, although I might switch back to Bootcamp just to get ever last drop of power out of SolidWorks. The new hard drive means I can reinstall the software I'd previously taken off and keep all my docs/photos/media on the laptop. The computer has also been running a lot cooler. I've actually been in the 40s when running light applications, which I haven't seen for a long time. It still hits 80 when I'm doing photo rendering, but that is to be expected. So, all in all a total success, although I could have done without the stress of almost ruining my computer.