Sunday, August 29, 2010

failing and fixing

so, as you may have read, i added a kit to my puch magnum. i was pretty proud of myself, although it still needed some adjustment to get it working perfectly. mainly it needed to be properly tuned. this meant determining if the air to fuel ratio was too rich (too much fuel) or too lean (too much air). running too rich isn't efficient as it wastes fuel and can also adversely affect performance (i.e. bogging). running too lean is not good at all. this condition causes the engine to run too hot and can cause serious damage to the engine (i.g. seizing the piston). ideally you want to be right in the middle of those and perhaps erring a bit on the side of rich, just to be safe. there are several factors that affect the air/fuel mixture (main jet, idle jet, throttle needle position, air filter, air leaks, altitude, etc). the most important of these when operating at wide open throttle (wot) is the main jet. the main jet is just a little piece of brass with a hole in it and allows fuel to flow into the carburetor where it mixes with air. there is a number stamped on the jet that indicates how large the hole is (and therefore how much fuel it will let in). to figure out what the fuel mixture is you have to do something called a plug chop. it's basically running the moped at wide open throttle for about a mile with a fresh spark plug and then taking it out and checking the color. if it's black then it's running too rich and if it's white it's too lean. tan to chocolate colored is just about right.

anyway, i did a couple plug chops and found a spot where it was brown, but probably on the lean side. i was running an 86 jet and wanted to try an 88, but didn't have one. i was going to order one, but this was right as i was moving. i figured i was close enough that i wouldn't hurt it. i had to make it 19.2 km (thanks google earth) from my old place to the new house. i made it 16.3 km. i pulled over and sure enough the engine was seized... oops! that's a first. so, i locked it to a pole and walked the remaining 3 kilometers (this is part of the fun of moped ownership). the next day i picked it up with a friend's truck and brought it back to the house. i also managed to blow out all three lights on the bike. that wasn't necessarily a surprise, but it's still a pain. this was caused by the bike going faster than it was originally designed to, which caused a spike in the voltage coming from the magneto, which blew everything up. i'll have to fix that too.

the first step was to take it apart and figure out what happened. i thought the piston had siezed, which is bad, but sometimes you can pound it loose with a hammer and a piece a wood and just keep riding it. it might require a new piston ring, piston, or cylinder if it's really bad. anyway, i took off the head and the cylinder and it turned out the piston was moving freely. that meant whatever went wrong happened in the crank case. i've never taken a crank case apart, so let the adventure begin.

first, it turns out they used flat head screws to hold the two halves of a E50 engine case together. this made disassembly a major hassle as many of the screws did not want to turn. i barely got it apart as i nearly stripped the heads on a couple of them. i made a note to replace them with socket head cap screws. so, i finally got it apart and this is what the crank looked like:


as you can see, the bushing that goes between the connecting rod and the wrist pin was mangled (although a lot of the mangling in the photo is from me trying to rip it out). i also cooked the bushing between the connecting rod and the crank. you can see all the heat marks around the area. this is what seized my engine. i could have tried to replace those bushings, but i decided to take the opportunity to replace the whole assembly with a higher performance crank. i also decided to replace the bearings and seals while the thing was torn apart (they sounded pretty worn out anyway).

by the way, i used this tutorial for rebuilding an E50 engine, which was a huge help.

here is engine pulled apart with the crank missing and just the gear that connects the clutch to the drive sprocket:

here are the two halves of the engine case. i decided to clean everything while it was in pieces:

this is the one of the old bearings coming off. i had to use a gear puller, which isn't shown:

then we skip all the way to the case reassembled, because i did a terrible job of taking photos. essentially is was straight forward. i had to take the old bearings and seals off, put new bearings and seals on the new crank, seal the case with silicon and then bolt it back together (with the new socket head cap screws). i also decided to put new heavier springs in the clutch while i had it apart (which also required buying a clutch puller). this means the engine revs higher before the clutch engages the wheel, which improves acceleration. you can see the new crank has needle bearings instead of brass bushings:


check out those sweet socket head cap screws:


the verdict: total success. it is really gratifying to have the whole engine in a bunch of little pieces laying around the garage, and then a few hours later i'm rocking down the street. i put in the 88 main jet and did another plug chop. it looks better, but i am going to try the 90 and see how that works. i got a voltage regulator which should minimize blowing out lights. although i'm not 100% how it works. i thought it was just supposed to to inline, but one of the leads is grounded, so that means the light doesn't work at all. right now i have it hooked up as a shunt. i am assuming when the voltage goes over a certain point it starts dumping power. i dunno? so far my headlight still works. i still have to revisit the electrical stuff and then comes the cosmetic improvements. first step: new lower handlebars.

Thursday, August 26, 2010

cool baby clothes from recycled fabric


my friend nathalie sent out an email about her cousin in berlin who makes baby's clothes from recycled fabrics. i just had a minute to check the site out and they are amazing. so, if you want your baby to be the coolest kid on the block and promote sustainability at the same time, have a look: http://www.laurie-d.de/

Tuesday, August 3, 2010

birthday making

i made this passport cover as a birthday present last week. the cover is 3mm thick designer felt and the cover sleeves are made out of one of my brother's old shirts. thanks matt!


Wednesday, July 14, 2010

kitting puch magnum

so, i've always been a purist when it comes to mopeds. i like to keep everything stock, or as close as i can. that changed today, when i did a cylinder/carburetor/exhaust upgrade to my 1978 puch magnum xk. i decided to do this because, while the stock magnum is great for getting around boulder, i can't make it easily to any of the surrounding cities (speed limit is at least 45 mph, even on the back roads). the stock moped tops out at around 33 mph. so, to get some more speed out of it i ordered a bunch of parts from treats and 1977. what i got:

- k-star 70cc cylinder kit w/ high compression head. i got the k-star because it was cheap and i didn't come across many people who have had issues with it. for those of you not familiar with mopeds, they all come stock with ~50 cubic centimetres of displacement (the engine size). this is because larger engines are considered motorcycles and therefore require a special license, higher cost of registration, and higher cost to insure (plus they use more gas). in order to get around this, you can buy a "kit" that replaces the cylinder, head, and piston and increases the displacement.
- 19mm dellorto phbg carburetor. a bigger engine needs more air and fuel, which means it needs a bigger carburetor (the part that mixes the air and fuel before it goes into the engine).
- 19mm intake. a bigger carb requires a bigger intake.
- tecno estoril exhaust. more air/fuel means more exhaust and therefore a larger exhaust pipe. i chose the estoril because it has a large powerband (range of RPMs where the engine is creating good torque) and the powerband is located in the middle of the RPM range. this means that it allows relatively good low end torque, which is important for starting, while still giving a good top speed.
- uni pod air filter. clean air means a cleaner carburetor and a cleaner cylinder, which makes for a happier carb and cylinder.
- ignition micrometer. i was tired of my little stick with lines drawn on it. this makes it easier to accurately set the timing (when the spark plug fires).
- cylinder studs. these hold the cylinder and the head to the crank case. i could have used the stock studs, but the threads on one of them was stripped. pow! new studs.

so, let the fun begin. first step, take the old head, cylinder, and piston off:


here is the k-star kit that i'm going to put on with the hi compression head:


first i have to put the new piston on. here's the new piston on the original connecting rod as well as a photo of the new and old piston showing the difference in size. woo! 20 more cubic centimetres:


now i just slide the cylinder over the piston, which is surprisingly easy since there is only one piston ring:


uh oh! first problem. my cheap-o k-star kit has a poorly tapped spark plug thread. this means the spark plug will not thread onto the head:


solution: buy a $30 tap and chase the threads (or send it back, but i am not patient). the proper tap for this spark plug is a 14mm x 1.25:


it was tricky getting the tap started in the existing threads, but i mustered enough patience and managed not to wreck the head. just be sure if you do this to clean off the head thoroughly. i used some isopropyl and a brush. pistons and cylinders don't take kindly to little metal shavings:


the head now attached with the spark plug in place:


next comes the carburetor and the intake. one of the float bowl vents was interfering with the moped's frame, so i just pulled it off. it still leans a little to one side, but it should be fine for now:


finally comes the exhaust:


i didn't expect the exhaust to mount properly since it was designed for a puch maxi and not a magnum. the mounting points don't line up, so i have to fabricate something. for now i'm just using a $4 exhaust mount that should keep it from breaking in half for the meantime:


the results: to my surprise it started right away. it was loud as hell because they sent me the wrong exhaust gasket, but i'm working on fixing that. so, i took it out on the street and it ran pretty well. it was bogging at wide open throttle, which i thought was because it was running lean, so i raised the throttle needle up a notch. it ran a lot better, so i did a plug chop and found it was still running lean, so i up-jetted to a 92 (from the stock 85). after another plug chop it looked better although i think i'm going to try the 95 i have to see how that runs. i'd rather be running rich, especially while i'm breaking in the new cylinder. so, i haven't had anyone pace me in a car to figure out the top speed (the speedometer only goes to 30 mph), but my best guess is she's topping out at 45 mph right now and i should be able to get a little more once i dial in the tuning. i also need a bit of tubing to attach the air filter to the carb, since there is no room for the larger filter. in conclusion: sweet!


next step:
- fabricate a mount for the exhaust. i really wish i had welding equipment.
- tune to perfection.
- install low rise handlebars
- get a voltage regulator so i stop burning out break and tail lights.
- paint the frame.

Tuesday, June 1, 2010

ipod touch screen repair. success!... sort of

as i mentioned in the last post, my ipod touch screen is cracked and i had the intention of fixing it. as i also mentioned/quoted in my last post, it is good to have the courage to screw up. well, i succeeded in both regards. i fixed the screen and i screwed up. i'll walk you through both below:

so, here is the busted screen. everything works just fine, it just looks lame. before i embarked on this repair it did occur to me that i could potentially make things worse. the new screen is on the right. i got it and a couple tools for taking it apart off ebay for $13.


first step: get it apart. not so tough.


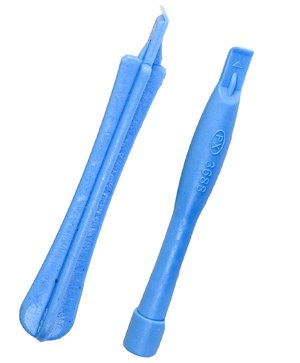
the ipod is held together by a bunch of tiny philips head screws and some adhesive. it takes some care and patience to carefully pry the battery off. i used my library card, but anything thin and plastic should do. for a step by step video for how to disassemble a 1st generation ipod check out this youtube video.


here's a better view of the cracked glass once i have all the electronics disconnected.


in order to remove the glass from frame you have to heat up the glue. this makes it easier to pop it out. unfortunately, despite the "pro" moniker, the andis EuroPro 1875 was not the most effective blow dryer. it eventually got the job done, but i recommend i higher quality dryer or perhaps a heat gun.


once i got the old piece of glass out i re-heated the glue with the dryer and stuck in the new piece. i'm not sure how much i trust this method, but it seems to be working for now. the best bet is probably to get some of that 3M double sided adhesive.


and then disaster! i was trying to be careful and slow with everything, but i still managed to break the little ribbon cable that attaches the wifi antenna. i tried to come up with a way to fix it, but it's pretty much a lost cause. the only way (i can see) to fix it is to replace all the electronics. if you happen to have a busted 1st generation ipod taking up space in a drawer i'd happily take it off your hands and try to make a frankenstein ipod. i'd gladly buy you a six pack of beer or root beer if you're underage. anyway, it's actually not too bad. the wifi still works, but i have to be within 10 feet of a router. that is silly and renders the internet nearly useless, but i do have a new shiny screen. and while that may not be a fair trade off, i'm glad i made the effort. i certainly won't be afraid to take apart my ipod again in the future, and next time i'll be more careful with the wifi antenna.


check out that beautiful screen!

Friday, May 28, 2010

the courage to screw up

this morning i found a great article on the huffington post by Mark Frauenfelder the editor-in-chief at make magazine. he was making the case for diy and listing the benefits of having the courage to screw up. i thought he made a great argument for diy, and certainly more eloquent than my list. here's his:

1. A deeper connection to the things that keep us alive and well. The human-made world is mostly beyond our comprehension. Our daily survival depends on seemingly magical gizmos that provide our food, water, clothing, comfort, transportation, education, well-being, and amusement. But you can make your world a little less confounding by sewing your own clothes, raising chickens, growing vegetables, teaching your children, and doing other activities that put you in touch with the processes of life. In addition, the things you make reflect your personality and have a special meaning. You share a connection with them every time you use them, and you appreciate them in a different way than you do store-bought things. This is why gifts of hand-made preserves, blankets, and furniture are so cherished. You are sharing a part of yourself with the recipient of your gift; they will value the time and effort you put into making something for them with your own hands far more than what it would have took to pick up a gift card at the mall.

2. An appreciation for the things you have and the systems that make it possible.The flip side to enjoying the things you make yourself is discovering how challenging and time-consuming it can be to make them. It takes me hours to whittle one cooking spoon, and while it's enjoyable, I can't imagine making all of our family's cooking implements this way. Now, I pay more attention to the things I buy, and I appreciate them more than before. Because I've become an active participant in the human-made world, I'm more observant of it. I care more about how things are made, paying close attention to each object for lessons in craftsmanship I can apply to my own projects.

3. An opportunity to use your hands and your brain. Human beings evolved opposable thumbs for a reason. The sense of reward you get from making something with your hands can't be earned any other way. It's obvious that people learn faster from "hands-on" experience than they do watching someone else do something. (No wonder kids ask, "Can I try?" when they see their parents using a tool or appliance.) And when people engage in DIY activities like knitting, their heart rate and blood pressure go down. We are tool-using animals and our bodies feel better when we've got tools in our hands.

4. A connection to other people. When I started making cigar box guitars, I stumbled onto a group of DIYers at a website called Cigar Box Nation. These amateur luthiers log in from around the world to share plans, photos, and videos of their home-made stringed instruments. They are happy to share ideas and advice about building guitars, banjoes, and ukuleles with newcomers. I've found this same spirit of generosity at other online hangouts devoted to building electric vehicles, autonomous aerial vehicles, and raising chickens. Even though time is our most precious resource, I've discovered that DIYers are happy to give their own time to people who seek their knowledge. (At Make, we are exploring this admirable quality of DIYers as a way to rethink traditional educational systems.)

5. A path to freedom. A number of DIYers I've met have succeeded in turning their passion for making things from a hobby into a business. In this era of economic uncertainty, DIYers have learned not to rely as much on governments and corporations to take care of them. They seek a more direct way to support themselves by becoming producers of high-quality, short-run products. For instance, Limor Fried transformed her passion for electronics into a full-time business called Ada Fruit that sells mail-order kits to hobbyists. Mitch Altman made a little remote control that could turn off any TV set, and it was so popular he started a company that sells electronic gadgets. Sites like Etsy.com and the Makers Market give DIYers a place to sell their handmade creations, ranging from hollow "spy coins" to silkscreened posters to revolving bookcases to chaotic pendulums. Even if you have no desire to become a full-time maker, DIY can provide a certain degree of freedom from depending on others for everything you need.

he also has a new book that i'm excited to check out.

in other news, i was bummed when my ipod touch screen cracked a few weeks ago. the good news is that it still works despite looking like hell. i was resigned to having an ugly ipod until my friend cameron sent me this link. apparently this can be fixed without paying apple $200. i've ordered some supplies and i'll let you know how it turns out. in the meantime, i'm trying to keep my moped from burning through brake lights every 10 minutes. my shunt resistor isn't working.

Saturday, May 15, 2010

road trips and mix tapes

so, i'm living in a friends basement and traveling a lot, which is not conducive to making and doing. someone seriously needs to start a diy workshop that i can go to... seriously. well, until i get around to opening a workshop i've been busy with other passions (the aforementioned traveling, public transit, and coffee shops). i just got back from a road trip from colorado to toronto, ottawa, and montreal. there is already a plan in the works for a trip to california at the end of june and perhaps another journey to the northwest in july. how am i paying for all this? well, i've been doing some freelance design work, which has actually been really enjoyable and lets me travel or sit in a coffee shop all day. i eventually need to get around to actually finding more work, but for now i'm happy to make some money and work on something that i like. by the way, there are some super secret screen printing projects in the works, but i am keeping a lid on it for now. in the meantime, check out some of these records, these are my favourite albums of 2010 so far:

1. Broken Bells - Broken Bells
2. Surfer Blood - Astro Coast
3. Broken Social Scene - Forgiveness Rock Record
4. The Tallest Man on Earth - The Wild Hunt
5. The New Pornographers - Together
6. Portugal. The Man - American Ghetto
7. The Apples In Stereo - Travelers in Space and Time
8. Basia Bulat - Heart of My Own
9. Four Tet - There is Love in You
10. Shearwater - The Golden Archipelago